5 Top Tips for Buying Vintage In-Person in the UK

Introduction:

Do you love buying vintage? In a world dominated by mass-produced, generic items, there’s a growing fascination with vintage and antique treasures that tell a unique story. The United Kingdom boasts a vibrant vintage scene, where enthusiasts can unearth hidden gems and embrace the charm of bygone eras. If you’re eager to embark on a nostalgic shopping adventure, here are five top tips for finding the best vintage items in person across the UK.

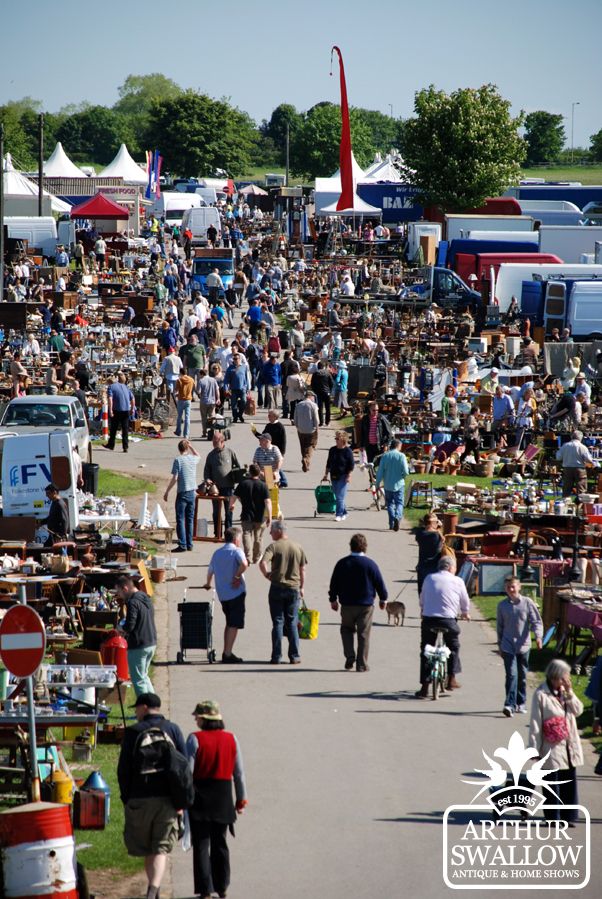
  1. Explore Vintage and Antique Fairs: Vintage and antique fairs are a haven for passionate collectors and antique aficionados. These events bring together a diverse range of vendors, each offering their carefully curated selection of vintage clothing, furniture, accessories, and more. From the bustling markets of London to the quaint village fairs, there are numerous options to choose from. Some notable events include the Affordable Vintage Fair, the Detling Antiques and Collectors Fair, and the Alexandra Palace Antiques & Collectors Fair. These fairs often provide a unique opportunity to interact with knowledgeable sellers and learn about the history of your chosen items.
  2. Embrace the Thrill of Auctions: Auctions offer a thrilling environment for those seeking vintage treasures and the potential for great deals. In the UK, there are various auction houses that specialize in vintage and antique items. From prestigious establishments like Sotheby’s and Christie’s to smaller regional auction houses, you can find a range of auctions catering to different budgets. Before attending an auction, it’s essential to research the items you’re interested in and set a budget. Pay attention to auction catalogues, which often contain detailed descriptions and estimates, allowing you to gauge the value of the items beforehand.
  3. Seek Hidden Treasures at Car Boot Sales: Car boot sales are an exciting hunting ground for vintage enthusiasts on a budget. These grassroots events see locals set up stalls in open fields, offering a mishmash of second-hand goods. While car boot sales are known for their randomness, you might stumble upon hidden vintage gems amid the assortment of items on display. It’s best to arrive early to secure the best deals and be prepared to haggle.
  4. Discover Unexpected Finds at Yard Sales: Yard sales, or garage sales, are another fantastic way to source vintage items in a more intimate setting. These sales typically take place at private residences, where homeowners clear out their unwanted possessions. You never know what you might find—vintage clothing, antique furniture, retro decor, and more. Keep an eye out for local listings in newspapers, community notice boards, and online platforms. Engaging in friendly conversations with the sellers may even lead to interesting stories behind the items or the opportunity to negotiate better prices.
  5. Uncover Hidden Gems at Charity Shops: Charity shops are a goldmine for vintage hunters with a philanthropic spirit. These stores, run by charitable organizations, often receive donations of pre-loved items that include vintage and retro pieces. From clothing and accessories to homeware and vinyl records, you can find an array of vintage treasures while supporting a good cause. Explore high-street charity shop chains like Oxfam, British Heart Foundation, and Cancer Research UK, as well as smaller local charities. Remember to visit regularly, as stock turnover can be quick.
Conclusion:

For vintage enthusiasts in the UK, the thrill of discovering unique pieces from the past awaits at various in-person shopping destinations. Whether you choose to explore vintage and antique fairs, attend auctions, peruse car boot sales, visit yard sales, or browse charity shops, each option offers its own unique experience and opportunities for finding vintage treasures. So grab your magnifying glass and embark on a nostalgic shopping adventure across the UK, where you can uncover hidden treasures, connect with history, and bring a touch of vintage charm into your life. Happy hunting!

Conquering Ground Elder: My 5-Year Success Story

Ground elder (Aegopodium podagraria) is an invasive weed that can quickly take over your garden, making it difficult to grow other plants. The plant spreads through its roots, which can travel deep into the soil and sprout new shoots, making it tough to eradicate.

But don’t lose hope if you are dealing with ground elder in your garden. With a little bit of persistence and patience, you can successfully remove it from your plot. Here’s how I managed to eradicate ground elder from my garden over a period of five years.

Year One

In the first year, I started by removing all visible ground elder shoots and then dug deep to pull out as much of the root system as possible. It’s essential to remove as much of the roots as you can, as even the smallest piece of root left in the soil can grow into a new plant. I was careful to dispose of the removed plant material correctly, as I didn’t want any of it to re-root.

I am afraid I didn’t photograph the process (hindsight is a wonderful thing), but here you can see the wood chippings laid on top of layers of cardboard.
Year Two

In year two, I repeated the process of removing visible ground elder shoots and roots. Then, I used the cardboard method, which involves covering the plot with layers of cardboard and then covering it with a thick layer of wood chippings. The cardboard helps to suppress the growth of any remaining ground elder, while the wood chips help to keep the cardboard in place and provide additional weed control.

Fortunately, I had access to plenty of wood chips from a large conifer that I had cut down and chipped. The key to this method is to ensure that there are no gaps between the cardboard layers and to use a thick layer of wood chips to cover the cardboard.

Year Three

In year three, I topped up the plot with more cardboard and wood chips. The idea behind this method is that the ground elder will struggle to grow through the cardboard and wood chips, and any shoots that do manage to push through will be easy to spot and remove.

Here you can see weeds growing on top of the wood chippings but they are surface weeds and easy to pull up
Year Four

In year four, I noticed that the ground elder was significantly suppressed, which was a positive sign. However, it was crucial for me to remain diligent and keep removing any remaining roots to prevent the weed from regrowing. Even though the infestation was less severe, I knew that allowing any remnants of the weed to remain could lead to a resurgence of growth, so I continued to be persistent in my efforts.

Year Five

Finally, in year five, I achieved success. There was very little ground elder left in the garden, and it was easy to weed out any signs of it. However, it’s essential to continue to be vigilant and keep an eye out for any new growth.

In conclusion, eradicating ground elder from your garden is a long and challenging process that requires persistence and patience. The key is to be consistent with the methods you use, remove as much of the root system as possible, and be vigilant about removing any new shoots that appear. It may take several years to eradicate ground elder fully, but with perseverance, you can eventually win the battle.

You might like to see more of my home and garden on You Tube https://www.youtube.com/@elegantlyknackeredstye

The wood chippings look nice on top of the layers of cardboard.

Palermo Food & Architecture: A Deliciously Inspiring Adventure

Palermo food, architecture, and flea markets.

A Sicilian adventure – are you ready for a four-day city break in Palermo filled with delicious food, awe-inspiring architecture, and unique flea markets? Palermo, Italy, has it all. My family and I recently stayed in a small apartment just a two-minute walk from Ballaro market and had a fantastic time exploring the city. In this blog post, I will share our favourite experiences, including where to find the best street food, the most impressive architecture, and the most unique flea markets. However, be warned that the streets of Palermo are often littered with rubbish, so keep that in mind as you plan your trip.

Palermo Food & Architecture

Food

Palermo is a food lover’s paradise, and street food is a big part of the city’s culinary scene. We tried several street foods during our trip, but two of our favourites were panelle and arancini. Panelle is a fried chickpea fritter served in a sandwich with bread and lemon. Arancini, on the other hand, are deep-fried rice balls stuffed with cheese, peas, and meat. Both were delicious and made for a great lunch on the go.

We also recommend trying granita and Sicilian ice cream for dessert. The granita is a semi-frozen dessert made with sugar, water, and various flavours and was refreshing on a hot day. The Sicilian ice cream, or gelato, was also a treat. We found the best pizza in Palermo at Pizzeria Assud, where the crust was perfectly soft and crispy, and the toppings were fresh and flavourful.

For a great cup of tea, we stumbled upon Teco, a charming cafe with a great atmosphere and vibe. It is also located on the same street as the Palermo tile museum, which I will talk about later.

Architecture and Interiors

Palermo’s architecture is a sight to behold, with ancient ruins, baroque churches, and art nouveau buildings dotting the city’s landscape. However, the highlight of our trip was the Palermo tile museum. Housed in a private home, this museum boasts an impressive collection of Sicilian and Italian antique tiles. The interiors of the home are just as inspiring as the tiles themselves, with every inch of the walls and floors covered in intricate designs.

Another must-see is the Palermo Cathedral, a stunning example of Norman architecture that has undergone several renovations over the centuries. Its unique blend of architectural styles and stunning mosaics make it a fascinating place to explore.

Food and Vintage Flea Markets

My husband and I snuck off on Saturday morning, on our own Sicilian adventure, leaving our teenage daughters to sleep in, on the hunt for vintage treasures. We ended up at Mercato delle Pulci, a unique flea market filled with antiques, vintage clothing, and quirky finds. While we only bought one thing, it was great fun to explore and see what treasures we could find.

If you’re looking for a more traditional market experience, head to Ballaro market, located just minutes from our apartment. Here you will find vendors selling everything from fresh produce to clothing and household items. It’s a vibrant and bustling market that gives you a taste of everyday life in Palermo.

The Litter Problem

While Palermo has much to offer tourists, it is important to note that the city’s streets are often filled with litter. While this may not be a deal-breaker for some, it is something to keep in mind as you plan your trip. The city is making efforts to address this issue, but it is still a problem in many areas. That being said, don’t let the litter stop you from exploring all that Palermo has to offer.

To Conclude

Palermo’s beauty, charm, and rich history are worth exploring despite the litter. With delicious food, breath-taking architecture, delicious food and unique flea markets, Palermo is a city that deserves to be explored and appreciated for all that it has to offer. So, pack your bags and get ready for a Sicilian adventure that will tantalize your taste buds, inspire your sense of wonder, and give you a glimpse into the everyday life of this vibrant Sicilian city.

If, like me, you like to travel, you might enjoy my other travel posts

Do you follow me on You Tube and Instagram? I’d love you to join me.

Tablescape Tips: Creating a Regal and Relaxed Afternoon Tea Fit for Royalty with Colours, Flowers, and Tableware

Tablescape Tips

Are you preparing for an afternoon tea fit for royalty but looking for a more relaxed and laid-back vibe for your tablescape? You’re in luck! With the right colour scheme, flowers, and tableware, you can create a regal yet inviting atmosphere that will make your guests feel like kings and queens. Here are some tips to help you design a regal and relaxed tablescape for your afternoon tea.

Choose a Royal Colour Scheme

When it comes to designing an afternoon tea tablescape fit for royalty, choosing the right colour scheme is crucial. Traditional royal colours like gold, silver, and red can give your tablescape an opulent and regal feel. However, if you’re looking for a more relaxed vibe, consider incorporating softer colours like blush, pale blue, or lavender.

Incorporate Elegant Flowers, no afternoon tea is complete without the perfect floral arrangements. For a more relaxed vibe, consider incorporating elegant flowers like roses, peonies, or hydrangeas in muted tones that complement your chosen colour scheme. Potted primula is another excellent option, adding a pop of colour and a touch of whimsy to your tablescape. You can also add some greenery, such as eucalyptus or ferns, to give your tablescape a natural, organic feel.

Chocolate Strawberry on miniature plates

Choose Classic Tableware

When it comes to tableware, classic and elegant pieces are the way to go for an afternoon tea fit for royalty. Opt for white or cream-colored plates with simple and clean designs. For a more relaxed feel, consider mixing and matching blue and white tableware and incorporating mismatched china teacups and saucers to create a unique and eclectic look.

Tablescape Tips Blueberry Cake

Add Luxurious Accents

To add some extra luxury to your tablescape, consider incorporating some glamorous accents like flatware with simple designs or decorative napkin rings. These little touches can take your afternoon tea tablescape to the next level and make your guests feel truly pampered.

Mix and match blue and white vintage china

In Summary

Designing a regal and relaxed tablescape for an afternoon tea is all about finding the perfect balance between opulence and comfort. By choosing a royal colour scheme, incorporating elegant flowers such as potted primula, mixing and matching blue and white tableware, and adding luxurious accents, including mismatched china teacups and saucers, you can create a stunning and inviting tablescape that will impress your guests and make them feel like royalty.

Tablescape For a King
Sweat Treat Menu Suggestions

And what better way to complement your beautiful tablescape than with a sweet treat afternoon tea menu that will delight your guests’ taste buds? Here are some scrumptious treats that you can serve:

Relaxed Tablescape Ideas
  • Strawberries and cream: A classic combination that is perfect for a spring or summer afternoon tea. Serve fresh strawberries with a dollop of whipped cream on the side.
  • Fruit scones served with butter, homemade raspberry or strawberry jam, and cream: A quintessential afternoon tea treat that your guests will love. Make sure to serve your scones warm with a selection of condiments on the side.
  • Meringue nests filled with soft fruit and cream: Light and airy meringue nests filled with a mixture of whipped cream and soft fruit, such as raspberries or blueberries, are a perfect addition to your afternoon tea menu.
  • Chocolate-dipped strawberries: Elevate your strawberries and cream with a luxurious touch by dipping the strawberries in melted chocolate.
  • Blueberry cake: A moist and fluffy cake studded with juicy blueberries is a delightful addition to your menu. Serve slices of cake on a tiered cake stand for an elegant presentation.
  • Passionfruit cheesecake: Creamy and tangy cheesecake with a tropical twist of passionfruit is a perfect way to end your afternoon tea on a high note.

And to wash down all these delicious treats, serve a loose-leaf English afternoon tea. Brew a pot of your favourite blend, such as Earl Grey or English Breakfast, and let your guests enjoy a cup of tea that is both comforting and refined.

By following these tips and serving a delicious, sweet treat afternoon tea menu, you can create a regal and relaxed tablescape that will leave a lasting impression on your guests.

Useful links

Please follow me on Instagram and You Tube, I’d love to have you along for the ride.

Have you seen my gluten free recipes? Here is my recipe for the best ever gluten and dairy free scones.

Tablescape Tips

Gluten-Free Scones: Perfecting the Recipe and Exploring the History

Gluten-Free Scones recipe

Gluten-free scones are a delightful treat that you can relish at any time of the day, whether it’s breakfast, brunch, or afternoon tea. Baking warm, freshly made scones is an experience that’s hard to beat, and even if you have dietary restrictions, you can still enjoy this mouth-watering treat. With the right ingredients and recipe, making gluten-free scones that are just as delicious as the traditional version is a breeze. After conducting numerous tests, I have finally perfected a gluten-free scone recipe that I’m thrilled to share with you. But before diving into the recipe, let’s explore the history of scones and how they became a beloved part of British cuisine.

Scones trace their roots back to Scotland in the early 1500s, where they were originally made with oats and cooked on a griddle. Over time, the recipe evolved to include wheat flour and baking powder, giving them a lighter texture. They gained popularity throughout the United Kingdom and were frequently served with jam and clotted cream as part of an afternoon tea.

In the late 1800s, scones became popular in the United States, where they were often prepared with fruit and nuts and enjoyed with coffee or tea. Today, scones can be found in bakeries and cafes worldwide, with countless variations of the classic recipe available. From savoury cheese scones to sweet chocolate chip scones, there’s a scone for every taste and occasion.

As a keen hobby baker, I have tested numerous scone recipes to develop the perfect gluten-free and dairy-free version. So, without further ado, let me share my favourite recipe with you!

Gluten-Free and Dairy-Free Scone Recipe

Ingredients:
  • 225g gluten-free plain flour + 2tsp baking powder or 225g self-raising gluten-free flour
  • 1/2 tsp salt
  • 30g caster sugar (granulated sugar will work just as well)
  • 55g dairy-free butter/spread (not too soft)
  • 55g sultanas (or any other dried fruit)
  • 150ml oat milk
  • Extra flour and milk
gluten free scone recipe
Equipment:
  • Mixing bowl
  • Wooden spoon
  • Teaspoon
  • Measuring jug
  • Weighing scales
  • Pastry brush
  • Ramekin
  • Baking tray
  • Baking parchment
Method:
  1. Preheat the oven to 200C and cover a baking tray with baking parchment.
  2. Combine the flour, salt, and sugar in a mixing bowl.
  3. Add the butter to the dry mixture and rub it all together.
  4. Mix in the sultanas with a wooden spoon.
  5. Gradually pour in the oat milk and mix with a wooden spoon until a soft dough forms.
  6. Shape the scones with your hands, making them twice the height you want them to be when cooked. Gluten-free scones tend to flatten out while baking.
  7. Place the scones on the baking tray and brush each one with milk.
  8. Bake for 10-12 minutes in the preheated oven.
  9. Once baked, remove from the oven and let cool.
gluten and dairy free scones

These scones are perfect for breakfast, brunch, or afternoon tea, and you can customize them to your liking. Whether you prefer plain scones or ones with fruit, this recipe is guaranteed to delight your taste buds.

So, what are you waiting for? Put on your apron, and let’s bake the best gluten-free and dairy-free scones ever!

Making Renovation Decisions

Decision fatigue has set in and there are ongoing challenges in making renovation decisions.

It’s a matter of heart versus head 

Making renovation decisions can be so hard. I’ve mentioned this before but it’s just not easy trying to balance architectural authenticity, traditional and sustainable building methods, with the practicalities of modern day living. Every decision we make here is considered but we often feel conflicted. It’s a matter of heart versus head.

These are the 4 current renovation decisions that we are trying to overcome: 

Restore or replace wooden the sash windows. 

When we first moved in, we were adamant that we would restore all the original sash windows. By original, I mean Victorian – these windows, as far as I am aware, were all part of Starre Corners red brick, Victorian facelift. We have even started working on then so why have a renovation dilemma now?  

Having lived through seven winters at Starre Corner it’s become clear that even with draught excluding improvements, the windows continue to be an energy efficiency issue. Much of the heat we generate is just going out the window.  

There is an imminent renovation decision to be made here; do we continue restoring the windows, with the addition of double-glazed glass units or do we opt for new replica wooden windows which will provide greater warmth, comfort and increased energy efficiency? 

Conclusion – the dilemma continues but we are swaying towards keeping the windows but first we need to wait to see if all the other insulation improvements make the house warmer and more energy efficient. 

Old front door v new front door 

We have never had any intention of replacing the beautiful, original wooden front door. We believe it is a Georgian door, as opposed to Victorian. It’s one of our favourite features in the house BUT, this year with the cost-of-living crisis hitting us all, it’s really made us consider the energy efficiencies of Starre Corner. The front door leads straight into a room we call, the cinema room, due to it having a ceiling mounted projector. It’s a relaxed, family room where the girls can entertain their friends and watch a film.  

This is a room we struggle to keep warm, despite internal wall insulation. Without a doubt this issue is part caused from draughts blasting in from around the door – we can see day light. Having spoken to a local joinery company they have quoted for an identical replacement door. Our heads tell us yes to replacing the door, but our hearts tell us no.

Conclusion – We’ve put this idea on hold for now. It’s a decision too far. We will do everything possible to not replace the door. Before making the final decision, we will make sure we have exhausted every possible draught exclusion possibility.  

Dig up the internal floors and insulate. 

Again, something we were adamant we wouldn’t do was dig up the flooring. In the original part of the house, Norfolk pamment tiles have laid for a good few hundred years.

Seven years of Starre Corner wintering however have made us think differently.  

Pamment tiles lay directly on bare earth and the radiate coldness throughout the winter months. Laying a rug down help take off the chill but even natural, breathable rugs become damp. If we take up the original pamments, dig down and fill with glass insulation beads, will we be able to relay the floor so that it still looks original? Can you imagine the chaos and mess of bringing in a mini digger into the house? It’s best not to think about it. 

Conclusion – yes, we will insulate the floor. We will carefully take up every single pamment, dig down the floor and lay a breathable, natural insulation layer. Yes, the challenge will be relaying the pamments but we will do our upmost to reinstate. Hopefully, they will look as though they’ve never been touched but realistically it will be tricky to replicate the years of natural wear and underearth movement. 

Exposed brickwork – keep it or cover it up? 

If we asked you what you think about us covering up the exposed brick, we know most readers would tell us to keep the exposed brick. At the start of our renovation journey, we would have agreed. It looks characterful and adds a great depth and texture to a room. 

Unlike Victorian bricks, 300-year-old Norfolk reds are not suited to being exposed; they are incredibly soft and crumbly. The look amazing but the reality is they are incredibly dusty and impractical. No brick sealant will stop them crumbling. Our hearts tell us to keep the bricks exposed but our heads tell us otherwise. 

Conclusion – Having lived with exposed bricks throughout most of the renovation the prospect of living with it for much longer becomes less appealing. We will be covering up most of the exposed brick work. 

Conclusion

The longer our renovation project goes on, the harder it becomes to make renovation decisions. Every decision counts when we’re trying to restore Starre Corner in a sympathetic manner.

If you would like to read more about our renovation project, please follow the link.

Did you know that Elegantly Knackered is on You Tube too? https://www.youtube.com/@elegantlyknackeredstyle/videos

Fava Fries Recipe

My Favourite Quick and Easy Gluten-free Lunch Recipe

gluten-free, dairy-free, vegan, vegetarian

Fava fries recipe

Fava fries recipe. Fava fries are currently my favourite quick and easy gluten-free lunch recipe. It’s such a quick and simple recipe to make, even on the busiest of days.

This recipe was inspired by one of my favourite artisan bakers, in Norfolk. Sidings Yard is a short drive away from my local town. Often, after a visit to my local antiques and vintage market I make my way to Sidings with my eldest daughter. I pick up sourdough loaf for the weekend and treat us to lunch. It’s a little, nearing the end of the working week treat, and ritual.

Every week I predictably order the same; green tea, fava bean panisse with garlic mayonnaise (or as I call them fava fries), plus a mixed salad. It may sound dull having this on repeat but that is testament to just how good they are.

Fava fries recipe

Panisse are traditionally a French dish, usually made with chickpeas. They are creamy, crispy chickpeas chips and make a healthy low carb alternative to chips or fries. I did experiment with chickpeas, but I much prefer the use of fava beans. The have a very subtle flavour. Fava beans are also known as broad beans.

One of the things that I love about this fava fries recipe is how quick and easy it is to make. I serve them with homemade garlic mayonnaise but could also be served with tomato ketchup or any other dip which takes your fancy.

Fava bean fries recipe
Fava Fries Recipe (serves 4)

Ingredients

100g Fava bean flour

1.5 tablespoon vegetable oil

500ml boiling hot water

Salt, to taste

Pepper, to taste

Fava Fries Method
  1. Mix fava bean flour and a generous portion of salt and pepper in a saucepan. Good seasoning is vital.
  2. Pour boiling water into the saucepan and whisk together. I use a Danish dough whisk.
  3. Put onto the hob and keep stirring with a Danish dough whisk or wooden spoon until the mixture starts to have an elastic texture. As soon as the mixture starts to change in texture, take it off the hob and stir off the heat for about a minute
  4. Pour into a small baking tray and leave to set. It should only take about 30 minutes.
  5. Once set cut into 1cm slices, so that they resemble a chip.
  6. Keep in an air-tight container in the fridge.
  7. To cook either shallow fry or bake in oven. They are cooked when they are slightly firm on the outside but soft in the centre. In my range cooker I bake the fava fries on the base of my main over for about 20 minutes.

My top tip. Make the fava fries in the morning, at the start of the day. This way, they will be ready a waiting at lunch time.

How to serve fava fries

My favourite way to way to eat Fava fries are with a homemade garlic mayonnaise dip (simply mix a teaspoon of lazy garlic into a small bowl of mayonnaise.

Alternatively, tomato ketchup would make a great tip or try serving as a side, instead of French fries/chips. They are delicious with salt and vinegar.

SHOP MY KITCHEN STYLE & INGREDIENTS:  

Lazy garlic 

Fava bean flour 

Danish dough whisk  

Baking Tray  

Pepper mill

Wedgwood Edme Plate

Cabbage ware plate

Terracotta tapas bowl

Naturally dyed antique linen napkins – most of my table linens are from GZbadboysantiques

Handcarved wooden spoon – Etsy have a great selection

As seen on You Tube

Cornishware Jug

Simplex Copper Kettle 

Vintage kitchenalia https://www.sugdenanddaughters.co.uk/french 

SEE MORE CONTENT  

You Tube : www.elegantlyknackeredstyle.co.uk 

Instagram: https://www.instagram.com/elegantlyknackeredstyle/ 

CONTACT:  

Work with me

PHOTOGRAPHY, VIDEOGRAPHY AND AUDIO EQUIPMENT USED:  

My camera – https://rstyle.me/+lBuERyKFrPiW1s1T4OZF1w  

Mobile Phone https://rstyle.me/+KitfR1EMXwVOqG4EvNhjLA  

Microphone – https://rstyle.me/+tsP4K-WxWwcnId2iT0ZvIw  

Smartphone tripod mount holder https://rstyle.me/+0uzTQlZyRiva663GcKlyNQ 

Aluminium overhead tripod https://rstyle.me/+g9H-mfJxjBejmsolxZ9FRQ 

Studio Lights https://rstyle.me/+L6DMxF229WjDZqIIsIS6OA 

Photography light reflector https://rstyle.me/+_vMsxI6YCjMT6Wo40BIi5w 

SD Card https://rstyle.me/+3klA1jBAXLr5HWwlDUPZHg 

 TOOLS & SERVICES I USE:  

Keyword research tool for YouTube (Tube Buddy) – https://www.tubebuddy.com/elegantlyknackeredstyle 

Affiliate marketing network LTK  

Disclaimer Some of the links, but not all, are affiliate links. If you buy a product or service with the links, I may receive a small commission. by following one of my links, I may receive a small commission. This does not affect the price you pay. Thank you for supporting my brand so I can continue to provide you with free content each week! 

FOR OTHER RECIPES CLICK HERE

Great Pubs of England

The Haunch of Venison, Salisbury, Wiltshire

Great Pubs of England Door into the Haunch of Vension

Continuing my Great Pubs of England series, let me remind you what I am doing: 

Last year I spotted a new book on Instagram – Great Pubs of England by Horst A. Friedrichs and Stuart Husband. I was instantly drawn to the photography and pub interiors, and I knew its content would appeal to my husband. Although neither of us are heavy pub users, we do both enjoy the welcoming vibe of a good British pub. After Mark received this gorgeous book, we vowed to make it more than just a coffee table book – we intend to visit all the pubs on it. 

If you enjoy this post, you will enjoy my other Great Pubs of England posts – Read more here

Great Pubs of England - Pewter bar in the Haunch of Venison

During a recent visit to Dorset, I took the took the opportunity to hop over the border to Wiltshire. Well, Salisbury to be more precise. The Haunch of Venison is a timber-framed grade II listed pub in the heart of Salisbury. It was built in the 15th century and extended in the 18th century.  

Great Pubs of England Mummified hand  in the bread oven

It’s easy to see why there are many tales of ghostly activity in this pub from mysterious floating drinks to a reputed resident ghost of a demented whist player and two female ghosts; a mother said to be looking for her son and a brothel worker who used to trade within the premises. It is a pub with nooks and crannies, creaky stairs, and a haunting atmosphere.  

Great Pubs of England  etched glass

I visited the Haunch of Venison for Sunday lunch which took me upstairs to the restaurant, but not before I explored the three small downstairs bars, known as the Horsebox, House of Lords and the House of Commons.  

Interior Pub Character

The bars are steeped in interior pub character filled with wood panelling, a tiled checkerboard floor, aged wooden floorboards, dark wood furniture, roaring fires, creating a dark-historic hue. It’s impossible not to feel the character and vibe as you walk through the door.  

The wood panelled horsebox, a former ladies snug is only big enough to swing a small cat. It’s reputed that Winston Churchill and Dwight D. Eisenhower plotted the D-Day landings, in 1944.  

Great Pubs of England - roaring fire

Entering the pub through it’s main doors, I entered the House of Lords bar. It was warm and busy with locals chatting next to a roaring and welcoming fire. I couldn’t help but notice the time worn pewter bar, one of five remaining in pewter countertops in England. This, main bar room is where the regulars make themselves comfortable and fill the bar with loud chatter.  After a few pints they obviously don’t notice the hard wooden benches.

Haunch of Venison Bar
The Demented Whist Player

Up a few steps and there is another small room, known as the House of Lords bar. In the corner of the bar, not to the inglenook there was quite a surprise – a mummified hand in a bread oven. But whose hand? It’s the hand of a card cheat, known as the demented whist player. No wonder the Demented Whist Player haunts the pub looking for his hand! All these rooms looked fitting for an afternoon of sociable drinking and merriment. Especially on the cold, wet day I visited, in January. 

wooden stairs

My family devoured a Sunday lunch in the upstairs restaurant. We went for a traditional beef Sunday lunch all round. The Haunch of Venison was a busy, buzzing restaurant and rammed full of hungry diner on my visit. Did I see a ghost? I know you want to know. Thankfully, I didn’t. I don’t think the pub ghosts want to come out to play haunted games when the pub is full of hungry humans.

Gluten-free Cake – Parsnip Recipe

Gluten-free Parsnip Fruit and Nut Cake

Gluten-free, Dairy-free, Vegan, Vegetarian

gluten free cake recipe

What are your first thoughts, if you think of a gluten-free cake – parsnip cake recipe, I won’t deny, I didn’t think favourably about it when I first heard of it. Who puts parsnips in a cake? Well, me apparently. 

gluten free cake parsnip cake

I was first introduced to parsnip cake, only last month during a holiday in Dorset. I was staying in a Plum Cottage, a pretty little estate cottage within the Deans Court estate. Hampered by chilly temperatures and rain all week I didn’t want to venture out much, but I always found a break in the clouds to wander up to the Deans Court café, which was less than a two-minute walk from the cottage. 

gluten free baking parsnip cake

It was obvious the first time that I entered the café that it was a little gem. Quietly tucked down a sleepy, dead-end road, it’s surprising to see the cafe so busy, but it soon became clear why. Deans Court also has a walled garden which makes the perfect pairing for the café. All the seasonal, fresh produce grown in the beautiful walled garden is used in the café. to conjure up delicious light lunches and tempting cakes. It was here, on my first visit to the café, when I first discovered the joys of a moist gluten-free parsnip cake. 

I visited most days during my holiday, just to experience another slice.  

gluten free cakes parsnip

Parsnips are reliable winter vegetables, so perfect this gluten-free parsnip cake is ideal for an autumn and winter sweet treat. There should be no surprised about the deliciousness of a parsnip cake. Afterall carrots and parsnips are closely related, and a carrot cake is also one of my favourite cakes. 

This is not a healthy cake, but it is a deliciously good cake

Don’t be fooled into thinking this is a healthy fruit and vegetable cake though. I hate to say it, but this cake is far from healthy. That’s what makes it so delicious.  

Thank you so much, Deans Court café for sharing your parsnip recipe with me. I have tweaked it slightly and now would love to share it on my blog. Every time I bake it, I will remember my happy Dorset Holiday at Deans Court. 

Find out about my stay at Plum’s Cottage

Gluten-free cake – parsnip cake recipe

Cake Ingredients

350g parsnips, diced into small pieces (500g before peeling)

100ml apple juice
2 tbsp maple syrup

275g gluten free self-raising flour (I use Doves Farm flour). If you do not follow a gluten free diet, the same quantity if regular self-raising flour works just fine.

1 level tsp baking powder

1 level tsp cinnamon

175g dairy free spread

150g granulated sugar

1 tsp vanilla extract

125g sliced dried dates

100g chopped mixed nuts

Cake Method

Pre-heat the oven to 180C/160C Fan/Gas 4

  1. Firstly, cook diced parsnips in apple juice until soft
  2. Whilst the parsnips are cooking, prepare other ingredients
    • mix flour, baking powder and cinnamon
    • cream together sugar, dairy free spread, and vanilla extract
    • Chop nuts and slice dates
  3. Once the parsnips are soft leave to cool and remove apple juice, keeping roughly one tablespoon of apple juice in the parsnips
  4. As soon as the parsnips are cool mix all cake ingredients, including maple syrup, in a large mixing bowl. Mix well.
  5. Put cake mix in a lined cake tin and cook in a pre-heated oven and cook for around 40 minutes. (it takes about an hour in my Aga style, wood pellet stove). The cake is cooked as soon a skewer inserted in the centre of the cake comes out clean.
  6. Allow to cool
gluten free cake recipes parsnip cake
Cake Topping Ingredients

100g icing sugar

2 tbsp maple syrup (more if necessary)

a handful of pecan or walnuts for the top

Cake Topping Method
  1. Mix icing sugar and maple syrup until a smooth. The icing should be of a pouring consistence. Add more maple syrup if need.
  2. Pour over cake. I personally love it when it drips over the edge.
  3. Top with pecans and nuts

Please do leave comments below. Have you made it? What do you think? Did you enjoy it? Improvement suggestions?

Click here to read about my stay at Deans Court

Gluten Free Pancake Recipe

Healthy buckwheat chocolate pancakes with chocolate avocado sauce

Delicious, healthy gluten and dairy free pancake recipe. 

Traditional British pancakes are a family favourite but finding a gluten and dairy free pancake recipe to score highly with my family has been a challenge. This recipe for healthy buckwheat chocolate pancakes with chocolate avocado sauce scores highly with all the family. 

I have followed a gluten and dairy free diet for many years because of gut health issues. Generally, I find it best not to try to replicate a non-gluten/dairy free recipe because it never tastes quite the same. I prefer to experiment with alternative ingredients and create a different taste experience. This recipe was first devised a few years ago and it is still a popular Pancake Day choice today.  

For this healthy gluten free recipe, I love topping with lots of fresh fruit. An alternative topping could be drizzling with a hot fruit puree.  

What will you be eating on Pancake Day? A traditional British pancake or a buckwheat chocolate pancake with chocolate avocado sauce? When you try it, please do let me know what you think. 

For this healthy gluten free recipe, I love topping with lots of fresh fruit or drizzling with a hot fruit puree. 

Ingredients and method 

Prepare the chocolate sauce first. 

Chocolate avocado sauce ingredients; 

1 large ripe avocado 

30g cacao 

1 banana 

10ml non-dairy chocolate hazelnut drink, such as Rude Health. 

1 tsp vanilla extract 

Pinch of salt 

Maple or agave syrup to taste 

Sprinkling of Canderel to taste if needed 

Chocolate avocado sauce method; 

Place all ingredients together in a food processor and mix until smooth. 

Buckwheat chocolate pancakes ingredients; 

6 eggs 

750ml non-dairy chocolate hazelnut drink, such as Rude Health. 

2 tbsp vanilla extract 

220g buckwheat flour 

50g almond flour or ground almonds 

30g cacao 

Pinch of baking powder 

Agave syrup, maple syrup, or sweetener such as Canderel to taste 

Coconut oil for frying 

Buckwheat chocolate pancakes method; 

Beat eggs, chocolate hazelnut drink, and vanilla extract in a large bowl. Once all combined add all dry ingredients and gently beat into the wet mix. Add agave syrup or sweetener as needed and mix in well. 

Heat coconut oil in a small frying pan and once the oil is hot, add a ladle of mixture into the frying pan. Allow the pancake to cook before trying to turn. Cook one pancake at a time and place in a warm oven until all pancakes are cooked. 

Serve with chocolate avocado sauce and fresh berries such as raspberries, blueberries, cherries, or strawberries. 

Top tip; add cherries or raspberries to the mixture before cooking. They taste delicious cooked within the pancake. 

If you enjoyed this gluten free pancake recipe you might enjoy more of my recipes. 

There are more recipes on My You Tube channel